Chicken Fried steak could be called the state dish of Texas. And there are as many different recipes as there are cooks in Texas. For my version, I went with the "Pioneer Woman's" online version. Heck, if it's good enough for a bunch of ranchers, it's good enough for me. For those of you not familiar with this comfort food dish, it is basically pan fried cube steak covered in batter, and served with 'milk gravy". The normal accompaniments would be mashed potatoes and fresh rolls. We went with french fries (potato and sweet potato) cuz , well , I was lazy and plus had fries in the freezer.
Into a bowl put one cup of milk and one egg, (double it if you are cooking alot of steak, we had 1.5 lbs.), and whisk well. On a plate combine two cups of flour with seasonings of your choice, we went with some cayenne and some spice mixture we had. Don't be shy, this is alot of flour and gets fried so you need to put plenty of spices, traditionally you would use cayenne and black pepper. Now comes the messy part, (I made Kris and Mike do this portion *S*). First dip the steak in the milk mixture, then the coat well with flour but shake off the excess, then back into the milk and back into the flour and set on a clean plate.
Now on to the frying, fill a cast iron pan with enough oil to go 1/2 way up the steak. I KNOW this isn't an exact measurement but I don't know how big your pan is. Remember you are pan frying not deep frying so you don't want your steak submerged. Get the oil hot, if you have to be specific, I would say 375 but I let it heat up until a drop of flour sizzles big time. Carefully drop in the steak, dropping them away from you as it WILL splatter. Let fry until golden brown (you can peak if you want) and then carefully flip them over, frying until the other side is nice and brown. Put them on a plate covered in paper towels and place them in an oven heated to 225 to keep crispy and warm.
Once all the frying is done, its time for the most important part of the operation, the milk gravy. Drain off all the oil, reserving 1/4 cup. Let the pan cool down a bit (believe me this is important) and add the oil back in along with 1/4 cup flour, (this forms a roux). Cook together on medium heat and stir until the roux turns golden brown, keep an eye out as this can burn easily. Once you get to the correct color, start adding in milk, just a bit at a time, and YES it will be a total solid lump. Keep whisking until you have added all two cups of milk. Grind in a copious amount of black pepper and whisk until heated thoroughly. Take off heat, pour over fries and steak and ENJOY.
To this incredible feast, I added homemade dinner rolls. As before, I made the dough in my bread machine but it could easily be done in a stand mixer or even by hand if you so desire. Here is the recipe;
1 cup water
2 tablespoons butter softened
1 egg
3 1/4 cups bread flour
1/4 cup sugar
1 teaspoon salt
3 teaspoons yeast
Place all ingredients in bread machine and set to dough cycle. Once the dough is ready remove from machine and let rest for 10 minutes on a lightly floured surface. Divide dough into 15 equal pieces and roll each piece into a ball. Place in a well greased baking pan and let rise in a warm place for 45-60 minutes. Bake at 375 for 12 to 15 minutes and brush with melted butter YUMMY.
And there you go a rather easy but extremely tasty meal.

Showing posts with label recipe. Show all posts
Showing posts with label recipe. Show all posts
Friday, March 23, 2012

Tuesday, March 13, 2012
A Christmas Feast.
We have never done a formal dinner from scratch before. So for Christmas 2011, we invited Mike and Kris and decided to go all out. Costco's sells a gorgeous rack of pork every year at the holidays, so I picked one of them up, to pair with it my famous (in my mind anyways), Pommes Anna. And, to really go out on a limb, homemade crescent rolls, (or as my recipe book calls them Butterhorn rolls, must be a copyright thing).
This sounds like alot of work, but truthfully it all comes together really easily. Start with the Crown Roast of Pork. Combine 2 tablespoons olive oil, 2 tablespoons garlic, 4 tablespoons chopped sage, and 2 tablespoons chopped thyme, (don't worry too much about the herbs, anything will work, in addition to the thyme and sage, we added 2 tablespoons rosemary and a big helping of garam masala), what ever you have will work, don't be afraid to make your own combo. When your done, you should have a nice paste, (if you need more olive oil go ahead and add until a thick paste forms). Rub the entire roast with the herb mixture and season generously with salt and pepper. Allow the roast to sit for 1-2 hours with the mixture and then roast at 450 for 15 minutes, turn down the oven to 350, and continue roasting until an instant read thermometer reads between 150-160. Remove roast and tent with aluminum foil for at least 20 minutes to allow juices to set. Carve and serve, I guarantee this will be one of the most tender, juicy pieces of pork you will ever eat.
Pommes Anna is sort of a potato pancake and goes perfectly with any roast meat. I have made this version several times and everyone just loves it. To make this correctly you will need two very important pieces of equipment. A mandoline and a cast iron frying pan. I supposed this could be done without either, but it will be a lesson in frustration. First the mandoline, this is basically a potato slicer but you really need this unless you can slice potatoes really thin and evenly by hand, (I can't). Slice two pounds of potatoes, (depending on the size of your party and cast iron pan you may need more or less). Make sure you are using a well seasoned cast iron pan, (I used a brand new one, not so smart) and brush it liberally with melted butter. Now comes the fun part, first a layer of potatoes, now brush that layer with melted butter, sprinkle on a layer of parmigiana cheese and salt and pepper the layer and continue in this way until you have a potato cake about 1 to 2 inches high (depends if you like a crisp cake or a more soft cake on the thickness, I like crisp so I stop at about 1 1/4 inches). Put a layer of aluminum foil over the potatoes and add a heavy weight (brick works good) to the top and push down to compact the cake. Place pan on stove top, over medium heat, until bottom layer turns golden brown, about 3-5 minutes. Put the pan in a 400 degree oven, pressing the potatoes down occasionally and shaking the pan to keep them from sticking. Cooked until caramelized and potatoes are soft when pierced with a knife, about 30 minutes. Carefully drain off the excess butter, gently loosen bottom layer and flip onto plate for a beautiful presentation. Cut into slices and serve.
For the Crescent (Butterhorn) rolls, I used a bread machine on dough cycle. But you could just as easily use a mixer or even by hand, if you so desire. Start with;
3/4 cup milk
1 egg
3 cups all purpose flour
1 teaspoon salt
1/3 cup vegetable oil
1/3 cup sugar
1 1/2 teaspoons yeast
Place all the ingredients into your bread machine and set to dough cycle. DON'T walk away, keep checking the dough to see if it is too dry or wet and add extra flour or milk as needed. You should end up with a solid ball of shiny dough, not sticking to the walls or falling apart. Once you achieve that dough ball, you can walk away and let the machine do its thing.
When the dough cycle is done, remove dough and place on a lightly floured counter. Roll dough into a nice even log and divide in three. Form each dough log into balls, and roll the balls out into a 9 inch circle. With a pizza cutter divide your circles into 8 pieces. Starting at the wide end , roll each slice to its point. Place on ungreased cookie sheets with the point down and let rise in a warm place for 30-45 minutes until doubled. Preheat oven to 375, brush top of rolls with melted butter and bake for 12-15 minutes or until golden brown. DELICIOUS! WAY better than anything you will ever buy in a tube and they take very little effort.
So there you have it, a perfect holiday (or any time) meal. Add some nice vegetables and something for dessert, (we had crepes that I bought at Costco's, heated up and topped with nutella and whipped cream, YUM), and you are good to go. And for wine a lighter red is perfect, nice Pinot Noir maybe, or a Malbec would be perfect, maybe even a Zinfandel.
This sounds like alot of work, but truthfully it all comes together really easily. Start with the Crown Roast of Pork. Combine 2 tablespoons olive oil, 2 tablespoons garlic, 4 tablespoons chopped sage, and 2 tablespoons chopped thyme, (don't worry too much about the herbs, anything will work, in addition to the thyme and sage, we added 2 tablespoons rosemary and a big helping of garam masala), what ever you have will work, don't be afraid to make your own combo. When your done, you should have a nice paste, (if you need more olive oil go ahead and add until a thick paste forms). Rub the entire roast with the herb mixture and season generously with salt and pepper. Allow the roast to sit for 1-2 hours with the mixture and then roast at 450 for 15 minutes, turn down the oven to 350, and continue roasting until an instant read thermometer reads between 150-160. Remove roast and tent with aluminum foil for at least 20 minutes to allow juices to set. Carve and serve, I guarantee this will be one of the most tender, juicy pieces of pork you will ever eat.
Pommes Anna is sort of a potato pancake and goes perfectly with any roast meat. I have made this version several times and everyone just loves it. To make this correctly you will need two very important pieces of equipment. A mandoline and a cast iron frying pan. I supposed this could be done without either, but it will be a lesson in frustration. First the mandoline, this is basically a potato slicer but you really need this unless you can slice potatoes really thin and evenly by hand, (I can't). Slice two pounds of potatoes, (depending on the size of your party and cast iron pan you may need more or less). Make sure you are using a well seasoned cast iron pan, (I used a brand new one, not so smart) and brush it liberally with melted butter. Now comes the fun part, first a layer of potatoes, now brush that layer with melted butter, sprinkle on a layer of parmigiana cheese and salt and pepper the layer and continue in this way until you have a potato cake about 1 to 2 inches high (depends if you like a crisp cake or a more soft cake on the thickness, I like crisp so I stop at about 1 1/4 inches). Put a layer of aluminum foil over the potatoes and add a heavy weight (brick works good) to the top and push down to compact the cake. Place pan on stove top, over medium heat, until bottom layer turns golden brown, about 3-5 minutes. Put the pan in a 400 degree oven, pressing the potatoes down occasionally and shaking the pan to keep them from sticking. Cooked until caramelized and potatoes are soft when pierced with a knife, about 30 minutes. Carefully drain off the excess butter, gently loosen bottom layer and flip onto plate for a beautiful presentation. Cut into slices and serve.
For the Crescent (Butterhorn) rolls, I used a bread machine on dough cycle. But you could just as easily use a mixer or even by hand, if you so desire. Start with;
3/4 cup milk
1 egg
3 cups all purpose flour
1 teaspoon salt
1/3 cup vegetable oil
1/3 cup sugar
1 1/2 teaspoons yeast
Place all the ingredients into your bread machine and set to dough cycle. DON'T walk away, keep checking the dough to see if it is too dry or wet and add extra flour or milk as needed. You should end up with a solid ball of shiny dough, not sticking to the walls or falling apart. Once you achieve that dough ball, you can walk away and let the machine do its thing.
When the dough cycle is done, remove dough and place on a lightly floured counter. Roll dough into a nice even log and divide in three. Form each dough log into balls, and roll the balls out into a 9 inch circle. With a pizza cutter divide your circles into 8 pieces. Starting at the wide end , roll each slice to its point. Place on ungreased cookie sheets with the point down and let rise in a warm place for 30-45 minutes until doubled. Preheat oven to 375, brush top of rolls with melted butter and bake for 12-15 minutes or until golden brown. DELICIOUS! WAY better than anything you will ever buy in a tube and they take very little effort.
So there you have it, a perfect holiday (or any time) meal. Add some nice vegetables and something for dessert, (we had crepes that I bought at Costco's, heated up and topped with nutella and whipped cream, YUM), and you are good to go. And for wine a lighter red is perfect, nice Pinot Noir maybe, or a Malbec would be perfect, maybe even a Zinfandel.
Monday, March 5, 2012
Lamson Family Cinnamon Rolls
Or more specifically, wife's mom's cinnamon rolls, traditionally eaten with the meal, (weird, yea I know). This recipe takes a bit of time but the flavors are incredible, set aside a good portion of your morning and you will be greatly rewarded;
Ingredients;
1) 12 oz can of evaporated milk.
1/4 cup warm water.
1/2 cup sugar.
1/2 cup vegetable oil.
1/2 cup leftover mashed potatoes (unseasoned and no milk).
2 eggs.
3 envelopes dry yeast.
6 cups of flour.
To start, dissolve yeast in the warm water, add all the ingredients, except the flour, into a mixer and mix for 3 minutes. Gradually add the flour, until a dough ball forms,and knead by hand or with a dough hook attachment for 10 minutes. Place dough ball in well greased, large bowl and grease top of ball also, (Mom used Crisco, I used butter, butter makes it better *S*). Cover and allow to rise until doubled in a draft free, warm place, (approximately 1 3/4 to 2 hours). Punch down and repeat, this time allowing to rise about 1 hour. Punch down again and transfer to a lightly floured surface.
Filling;
1/3 cup softened butter.
3/4 cup brown sugar, (Mom used light brown sugar).
1 1/2 tablespoons ground cinnamon.
Divide dough into two sections and roll out each section, (one at a time of course), into large rectangles, and spread 1/2 of filling evenly over each section. Roll back up and slice into 1 inch slices. Add slices to greased baking sheets, cover and allow to rise for one more hour, (told you this was time consuming, you want to start early if you are serving these at lunch). Bake at 325 for 10 minutes and then turn up temp to 350 and continue baking till done , (OK, this is the EXACT recipe, but keep an eye out until they turn golden brown, about 10-20 more minutes). Let cool slightly and serve with your meal, OR,
For you traditionalists, you can now make the frosting;
Frosting;
1 stick softened butter.
2 tablespoons flour.
1 cup confectioners sugar.
1 dash salt.
1 teaspoon vanilla extract.
Beat all the ingredients together and slather on rolls. But first I encourage you all to try the rolls as a sub for dinner rolls, c'mon live on the wild side!

Ingredients;
1) 12 oz can of evaporated milk.
1/4 cup warm water.
1/2 cup sugar.
1/2 cup vegetable oil.
1/2 cup leftover mashed potatoes (unseasoned and no milk).
2 eggs.
3 envelopes dry yeast.
6 cups of flour.
To start, dissolve yeast in the warm water, add all the ingredients, except the flour, into a mixer and mix for 3 minutes. Gradually add the flour, until a dough ball forms,and knead by hand or with a dough hook attachment for 10 minutes. Place dough ball in well greased, large bowl and grease top of ball also, (Mom used Crisco, I used butter, butter makes it better *S*). Cover and allow to rise until doubled in a draft free, warm place, (approximately 1 3/4 to 2 hours). Punch down and repeat, this time allowing to rise about 1 hour. Punch down again and transfer to a lightly floured surface.
Filling;
1/3 cup softened butter.
3/4 cup brown sugar, (Mom used light brown sugar).
1 1/2 tablespoons ground cinnamon.
Divide dough into two sections and roll out each section, (one at a time of course), into large rectangles, and spread 1/2 of filling evenly over each section. Roll back up and slice into 1 inch slices. Add slices to greased baking sheets, cover and allow to rise for one more hour, (told you this was time consuming, you want to start early if you are serving these at lunch). Bake at 325 for 10 minutes and then turn up temp to 350 and continue baking till done , (OK, this is the EXACT recipe, but keep an eye out until they turn golden brown, about 10-20 more minutes). Let cool slightly and serve with your meal, OR,
For you traditionalists, you can now make the frosting;
Frosting;
1 stick softened butter.
2 tablespoons flour.
1 cup confectioners sugar.
1 dash salt.
1 teaspoon vanilla extract.
Beat all the ingredients together and slather on rolls. But first I encourage you all to try the rolls as a sub for dinner rolls, c'mon live on the wild side!

Monday, February 20, 2012
A (Non) Traditional Thanksgiving Feast.
For the first time ever, we decided to host a small gathering at our house for Thanksgiving, (as opposed to the 30+ usually at my parents house). Since this was our first time hosting, we went with a pretty much pre-cooked meal. All from Costco's except for the rolls, (more on them later) . For the star of the show, we went with a Niman Ranch ham from Costco's . For those of you who have never heard of Niman ranch, they produce sustainably raised meats, that have never been fed antibiotics or hormones. Yes, they are a bit more expensive but the flavor is incredible. And since they buy from 650 US farms and ranches, the money stays in the USA.
To go with the ham, scalloped potatoes. We could of course have made some homemade, (this was the wife's wish), but I decided to try another one of Costco's offerings and went instead with frozen cheddar potatoes. Both the wife and Kris thought this was strange, as their mom's homemade did NOT include cheese. But Mike and I thought they were quite good, never having had the originals. Here are a couple of pics of the ham and potatoes;


Now for rolls to go with this feast, we decide to try and replicate the Lamson Family tradition. And this is where things get a bit weird. The Lamson family rolls are actually cinnamon rolls. And NO they were not eaten for breakfast or dessert but rather with the meal like regular dinner rolls. Other than getting past the fact you are eating a cinnamon roll, they really went well with the meal. The glaze on the ham included brown sugar and cloves and the cinnamon in the rolls complimented it perfectly. Of course, when you are trying to recreate a childhood memory, things never seem as good. But for Mike and I, who had never had the originals, we thought they were GREAT. I will write a separate post with the exact recipe, as it is pretty involved. For now here is a pic;

We tasked Kris with the vegetables and she came up with two great dishes of carrots and squash (or so I was told, as I don't do vegetables so much). A great meal was had by all and for dessert, another Costco's original;

For our official Costco's ratings;
Niman Ranch Ham A+
Main St Bistro potatoes B
Dessert Assortment A-
And there you go, a rather simple, but elegant Costco's Thanksgiving.
To go with the ham, scalloped potatoes. We could of course have made some homemade, (this was the wife's wish), but I decided to try another one of Costco's offerings and went instead with frozen cheddar potatoes. Both the wife and Kris thought this was strange, as their mom's homemade did NOT include cheese. But Mike and I thought they were quite good, never having had the originals. Here are a couple of pics of the ham and potatoes;


Now for rolls to go with this feast, we decide to try and replicate the Lamson Family tradition. And this is where things get a bit weird. The Lamson family rolls are actually cinnamon rolls. And NO they were not eaten for breakfast or dessert but rather with the meal like regular dinner rolls. Other than getting past the fact you are eating a cinnamon roll, they really went well with the meal. The glaze on the ham included brown sugar and cloves and the cinnamon in the rolls complimented it perfectly. Of course, when you are trying to recreate a childhood memory, things never seem as good. But for Mike and I, who had never had the originals, we thought they were GREAT. I will write a separate post with the exact recipe, as it is pretty involved. For now here is a pic;

We tasked Kris with the vegetables and she came up with two great dishes of carrots and squash (or so I was told, as I don't do vegetables so much). A great meal was had by all and for dessert, another Costco's original;

For our official Costco's ratings;
Niman Ranch Ham A+
Main St Bistro potatoes B
Dessert Assortment A-
And there you go, a rather simple, but elegant Costco's Thanksgiving.
Monday, January 30, 2012
Cooking 101: Grilled Indian Tuna Salad
Another very simple recipe, takes no time but is TOTALLY dependent on one ingredient. You must have Sashimi quality Tuna available in your area, (shockingly our local Costco has some fresh and beautiful steaks). Start by finding your favorite spice mixture. For this recipe I used an Indian rub I had in the spice drawer,( you do have a spice drawer correct?), hence the name.

I like to add layers of flavor to a dish, so I started with some liquid Jamaican jerk sauce rubbed into the steaks, followed by a healthy tablespoon of spice rub and lastly I toasted some sesame seeds, (toasting gives them another layer of flavor, all about layers) and thoroughly covered each steak with sesame seeds. Then I let them sit for a couple of hours in the fridge, to let the flavors sink in. Just a couple words of caution about toasting sesame seeds, A) sesame seeds go from toasty to burnt in a split second, B) As sesame seeds toast they pop and jump around alot, have something over the top of the pan, (I used a grease screen) and finally C) If you think your cool and can do the wrist flip to flip over the food in your pan, remember that sesame seeds ALL OVER the kitchen make a mess.


While your tuna sits in the fridge, prepare your salad. In this case I had found a nice "bag a salad" at Costco. It was called Parisian salad and came with some mixed lettuces, candied almonds, dried cranberries, feta cheese with a white balsamic vinaigrette. Sounds weird, but there is alot going on in this salad, some sweet, some sour, some salty, all of it very good and the flavors mixed incredibly with the finished tuna. Speaking of, now would be a good time to get that grill heated up, crank it up to high because you want a good crust and not much else, as we shall see. Once the grill is red hot, drop in your steaks, this is critical DO NOT walkaway, you want just a minute or two on each side, yea, yea, I know you don't like rare fish, get over it. Believe me when I say this is a totally different meal if the fish is cooked well done or even medium. The tuna will take on a whole different consistency, not necessarily bad but different. When good tuna is rare it has the feel of butter, soft, melts in your melt, luscious. Medium or (shudder), god forbid, well done tuna taste and feels more like what you get in the can, and if that's what your after, WHY oh WHY, pay for these gorgeous steaks??


As always, lets your steaks rest a bit and then slice into 1/3 to 1/2 inch wide slices, (no, you don't need a ruler). Arrange around the salad, (yes, presentation counts, even at home) and enjoy.
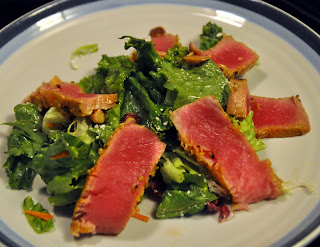
A word about wine. As most of you know from reading here, I do not always subscribe to the "white wine with fish" theory. Salmon goes incredibly well with an Oregon Pinot Noir and for Tuna Steaks you need a big hearty red, look at the picture, does that not remind you of a big juicy steak. So for this meal I chose a wine from one of our favorite little wineries, Oso Libre, ( you may remember them from the Tiny Thai review). I chose their 2008 Carnal, this is big wine, a nice blend of six different grapes, the majority being Syrah at 51%, Mourvedre at 21% and Grenache at 22%. We once went to a great wine school and something the instructor told us always stayed with me, pair spice with spice. And while a Zinfandel would have more pepper notes, the Carnal has some great mocha spices going for it, not to mention some wonderful stone fruit on the nose, mainly cherries. This turned out to be a PERFECT pairing, the flavors of the salad, the tuna and the wine blended together in perfect harmony. Total Bliss, If you can't find Oso Libre, look for a nice California Zinfandel or Syrah, these will all match great.


I like to add layers of flavor to a dish, so I started with some liquid Jamaican jerk sauce rubbed into the steaks, followed by a healthy tablespoon of spice rub and lastly I toasted some sesame seeds, (toasting gives them another layer of flavor, all about layers) and thoroughly covered each steak with sesame seeds. Then I let them sit for a couple of hours in the fridge, to let the flavors sink in. Just a couple words of caution about toasting sesame seeds, A) sesame seeds go from toasty to burnt in a split second, B) As sesame seeds toast they pop and jump around alot, have something over the top of the pan, (I used a grease screen) and finally C) If you think your cool and can do the wrist flip to flip over the food in your pan, remember that sesame seeds ALL OVER the kitchen make a mess.


While your tuna sits in the fridge, prepare your salad. In this case I had found a nice "bag a salad" at Costco. It was called Parisian salad and came with some mixed lettuces, candied almonds, dried cranberries, feta cheese with a white balsamic vinaigrette. Sounds weird, but there is alot going on in this salad, some sweet, some sour, some salty, all of it very good and the flavors mixed incredibly with the finished tuna. Speaking of, now would be a good time to get that grill heated up, crank it up to high because you want a good crust and not much else, as we shall see. Once the grill is red hot, drop in your steaks, this is critical DO NOT walkaway, you want just a minute or two on each side, yea, yea, I know you don't like rare fish, get over it. Believe me when I say this is a totally different meal if the fish is cooked well done or even medium. The tuna will take on a whole different consistency, not necessarily bad but different. When good tuna is rare it has the feel of butter, soft, melts in your melt, luscious. Medium or (shudder), god forbid, well done tuna taste and feels more like what you get in the can, and if that's what your after, WHY oh WHY, pay for these gorgeous steaks??


As always, lets your steaks rest a bit and then slice into 1/3 to 1/2 inch wide slices, (no, you don't need a ruler). Arrange around the salad, (yes, presentation counts, even at home) and enjoy.

A word about wine. As most of you know from reading here, I do not always subscribe to the "white wine with fish" theory. Salmon goes incredibly well with an Oregon Pinot Noir and for Tuna Steaks you need a big hearty red, look at the picture, does that not remind you of a big juicy steak. So for this meal I chose a wine from one of our favorite little wineries, Oso Libre, ( you may remember them from the Tiny Thai review). I chose their 2008 Carnal, this is big wine, a nice blend of six different grapes, the majority being Syrah at 51%, Mourvedre at 21% and Grenache at 22%. We once went to a great wine school and something the instructor told us always stayed with me, pair spice with spice. And while a Zinfandel would have more pepper notes, the Carnal has some great mocha spices going for it, not to mention some wonderful stone fruit on the nose, mainly cherries. This turned out to be a PERFECT pairing, the flavors of the salad, the tuna and the wine blended together in perfect harmony. Total Bliss, If you can't find Oso Libre, look for a nice California Zinfandel or Syrah, these will all match great.

Friday, December 9, 2011
Cooking 101: Carribean Pork Sliders
Sometimes simple is best, especially when you are talking about making supper on a week night, when one partner is coming home from a hard days work and the other partner leaves for work at 11PM. Those are the nights that simple works best, and if you can throw something in the slow cooker (crockpot for those of us born a LONG time ago), first thing in the morning, and have a hot flavorful supper when you get home, Life is Good !! This meal starts with a pork loin and a marinade I wish I could remember where I bought, most likely Costco's as it's a big honkin bottle. The marinade is;

Add pork loin (or loins if feeding a crowd or you want leftovers and you WILL want leftovers) to the slow cooker. Add enough marinade and chicken stock, ( I went 50/50) to cover the loins. An optional step, if you are so inclined, would be to get your grill red hot and sear the pork on all sides, this will add an extra dimension of flavor to the dish, but if your in a hurry just chuck em into the cooker. Throw in a few pineapple slices, attach the lid, set on low and walk away. Just a quick aside, if you have the time to sear, I would encourage it, I did this recipe both ways and the nice brown crunchy bits add alot of flavor and texture when you shred the pork. One other tip, they make slow cooker liners, and these have been a GODSEND for all these recipes, they make clean up a breeze, well worth the investment.


Set your cooker on low and let it go for 3-6 hours. At this point you will have very flavorful pork and some incredible sauce. Remove the pork and start shredding, it will be so tender it shreds easily. Pour the liquid into a heavy duty saucepan and start boiling, keep your eye on it though cuz if it boils too long it will end up being a very thick syrup (we almost made that mistake). Here is a plate of deliciousness;

And to serve with this delight, well a Tropical Mango smoothie of course. I found some smoothie mixes in the freezer of our local grocery store, one of which became this great drink with the addition of some mango and coconut rums and a bit of mango juice;

And now to put it all together, you saved some pineapple slices right? Grill the slices and some rolls topped with butter until both form a nice crust. Top the shredded pork with the sauce you reduced and assemble, one roll, one pineapple slice and a big helping of shredded pork. We baked some fries in the oven and VOILA;

Once again, a relatively easy prep makes a great evening supper. And to top it off this pork is incredible the next day, so PLEASE make extra.

Add pork loin (or loins if feeding a crowd or you want leftovers and you WILL want leftovers) to the slow cooker. Add enough marinade and chicken stock, ( I went 50/50) to cover the loins. An optional step, if you are so inclined, would be to get your grill red hot and sear the pork on all sides, this will add an extra dimension of flavor to the dish, but if your in a hurry just chuck em into the cooker. Throw in a few pineapple slices, attach the lid, set on low and walk away. Just a quick aside, if you have the time to sear, I would encourage it, I did this recipe both ways and the nice brown crunchy bits add alot of flavor and texture when you shred the pork. One other tip, they make slow cooker liners, and these have been a GODSEND for all these recipes, they make clean up a breeze, well worth the investment.


Set your cooker on low and let it go for 3-6 hours. At this point you will have very flavorful pork and some incredible sauce. Remove the pork and start shredding, it will be so tender it shreds easily. Pour the liquid into a heavy duty saucepan and start boiling, keep your eye on it though cuz if it boils too long it will end up being a very thick syrup (we almost made that mistake). Here is a plate of deliciousness;

And to serve with this delight, well a Tropical Mango smoothie of course. I found some smoothie mixes in the freezer of our local grocery store, one of which became this great drink with the addition of some mango and coconut rums and a bit of mango juice;

And now to put it all together, you saved some pineapple slices right? Grill the slices and some rolls topped with butter until both form a nice crust. Top the shredded pork with the sauce you reduced and assemble, one roll, one pineapple slice and a big helping of shredded pork. We baked some fries in the oven and VOILA;

Once again, a relatively easy prep makes a great evening supper. And to top it off this pork is incredible the next day, so PLEASE make extra.
Wednesday, November 23, 2011
Cooking 101; Beer Braised Short Ribs
Well, what do you know an actual recipe and not just a product review from Costco's. This recipe calls for a bit of prep but once done you can chuck it into the slow cooker and leave it be for the rest of the day.Beef short ribs are available most anywhere and usually for a very reasonable price. For this recipe I prefer the boneless ones as I really don't like carving around bones. I know experts say bone-in releases more flavor but c'mon look at the marbling in these beauties, how much more flavor do I need?


The first step is to create a spice rub and let your ribs marinade in the rub for at least an hour, (longer is better, MUCH better). That's why this first step could be done the night before, especially if this is going to be a weeknight supper. Also this may be a good time to tell you , that while I used a slow cooker, the original recipe called for a dutch oven. The first time we tried this recipe, we did go the dutch oven route. The advantage of course, is everything can be prepared in one dish, making clean up relatively easy. The downside, and the reason we went with slow cooker, (I still want to call it a crockpot), is that I don't like having the oven on for 3-4 hours, it really heats the house up.
Back to the recipe, combine 1/4 cup packed brown sugar, 1 tablespoon each of paprika, cumin, black pepper and salt. Now I veered from the original recipe a bit, as it called for 2 tablespoons of mustard, but as we don't care so much for mustard flavor, we created a paste with basil olive oil, but feel free to use mustard if you like that flavor. Combine all the ingredients and rub the ribs completely, marinate in the fridge for at least an hour or overnight. This would be a good time to roughly chop up an onion, 4-6 carrots, 2 celery stalks and 6-8 peeled and smashed garlic cloves, (I used 8, I LOVE garlic). here is a pic of the spice mixture ready to add;

Once the ribs are marinated, heat up a pan and add the ribs to brown, if you are using a dutch oven, add some oil first and heat that up before putting in the ribs, we used a non-stick pan instead. Brown all sides of the ribs and remove from the pan, add the onions, carrots and celery and cook until they start becoming soft. At this point, add 2-3 bay leaves, 5-6 sprigs of thyme (and any other fresh herbs you have around, I had basil and some dill) and the garlic. Once they are cooked a bit, move everything over to the slow cooker and here is where things are a bit confusing. The liquid portion will totally depend on the size of your cooker and how many ribs you are making.
As you can see, we had six ribs (which I cut in half for ease of fitting into the cooker). So in my case I used one cup of beef stock, one 28 ounce can of crushed tomatoes and 1 and 1/2 beers (HEY, I was thirsty), and this was enough liquid to cover the meat (VERY important). Then, just put your cooker on low and relax for 5-6 hours.

After said hours, move the meat and vegetables to a platter. Strain the remaining liquid into a heavy duty saucepan and turn the burner on high. Taste the sauce and season as needed, we felt that the sauce was missing something, a bit of acidity maybe?, some flavor?, so we add a healthy dollop of Balsamic Vinegar.
Bingo, this was the added flavor we needed. Let boil until sauce has reduce to your favorite consistency, we like it a bit thick but not syrupy, so we reduced it about 1/3 of the original amount. Perfect. And the finished dish;
Bingo, this was the added flavor we needed. Let boil until sauce has reduce to your favorite consistency, we like it a bit thick but not syrupy, so we reduced it about 1/3 of the original amount. Perfect. And the finished dish;

So there you have it, a perfect fall supper for those cool nights. A nice glass of hearty red wine, I suggest something with some depth and weight to it for this meal, Cabernet Sauvignon for sure, or a California Syrah or maybe a Rioja from Spain, would work. A nice fresh roll to sop up the sauce, and life is grand. And since this is a perfect fall dish, a few pictures of our colorful, but too short, Fall;


Thursday, September 29, 2011
Cooking 101; Grilled Pesto Salmon
OK, this one is very easy. All it takes is some good salmon, some fresh pesto and a grill. This is literally one of those 5 minute meals you are always hearing about. I don't know about you, but every time I see one of the Food Network shows about 5 minute meals I cringe. Sure, maybe if you have a team of chefs behind you doing all the prep and clean-up but for us normal folks it's an hour at least. Not so this one, it's a snap to prepare, have ready, and on the table in no time. First the ingredients;
1) Side of good salmon ( you know how I feel about farm raised but if it's all that is available go ahead).
2) Pesto, homemade is best but if you are lucky like us to have a great farmers market nearby, go ahead and buy some there. I try to avoid the supermarket stuff as it has usually been made months ahead of time and uses alot of preservatives to keep it stable. Here is our excellent farmers market find;

Here is great recipe for homemade;
1 Combine the basil in with the pine nuts, pulse a few times in a food processor. (If you are using walnuts instead of pine nuts and they are not already chopped, pulse them a few times first, before adding the basil.) Add the garlic, pulse a few times more.
2 Slowly add the olive oil in a constant stream while the food processor is on. Stop to scrape down the sides of the food processor with a rubber spatula. Add the grated cheese and pulse again until blended. Add a pinch of salt and freshly ground black pepper to taste.
Now life could not be more simple. Heat up your grill. If you happen to have a few nice dinner rolls, slice them open add a pat of butter to them, wrap in aluminum foil and throw on the grill to warm up. Spread the side of salmon (obviously not the skin side), with a nice even layer of pesto and put on the grill, pesto side down. DON"T walk away, pesto is made of oil after all and this will catch your grill on fire. You want to leave it just long enough to get some nice grill marks. With a couple of spatulas, do a quick flip of the salmon, and continue to grill until fish starts to flake easily. Do not, I repeat DO NOT, overcook. The thickest part of the fish should still be very red, it will finish cooking off the grill. Remove fish and rolls from the grill and let sit for about 5 minutes. This would be a good time to make a quick salad. Don't forget to throw some fresh herbs in the salad, they will pair well with the basil in the pesto. I suggest a nice Pinot Noir from Oregon (shocking really I know, I suggest this wine with everything). Slice and enjoy, voila;

1) Side of good salmon ( you know how I feel about farm raised but if it's all that is available go ahead).
2) Pesto, homemade is best but if you are lucky like us to have a great farmers market nearby, go ahead and buy some there. I try to avoid the supermarket stuff as it has usually been made months ahead of time and uses alot of preservatives to keep it stable. Here is our excellent farmers market find;

Here is great recipe for homemade;
Fresh Basil Pesto Recipe
10 minutes
Ingredients
- 2 cups fresh basil leaves, packed
- 1/2 cup freshly grated Parmesan-Reggiano or Romano cheese
- 1/2 cup extra virgin olive oil
- 1/3 cup pine nuts or walnuts
- 3 medium sized garlic cloves, minced
- Salt and freshly ground black pepper to taste
1 Combine the basil in with the pine nuts, pulse a few times in a food processor. (If you are using walnuts instead of pine nuts and they are not already chopped, pulse them a few times first, before adding the basil.) Add the garlic, pulse a few times more.
2 Slowly add the olive oil in a constant stream while the food processor is on. Stop to scrape down the sides of the food processor with a rubber spatula. Add the grated cheese and pulse again until blended. Add a pinch of salt and freshly ground black pepper to taste.
Now life could not be more simple. Heat up your grill. If you happen to have a few nice dinner rolls, slice them open add a pat of butter to them, wrap in aluminum foil and throw on the grill to warm up. Spread the side of salmon (obviously not the skin side), with a nice even layer of pesto and put on the grill, pesto side down. DON"T walk away, pesto is made of oil after all and this will catch your grill on fire. You want to leave it just long enough to get some nice grill marks. With a couple of spatulas, do a quick flip of the salmon, and continue to grill until fish starts to flake easily. Do not, I repeat DO NOT, overcook. The thickest part of the fish should still be very red, it will finish cooking off the grill. Remove fish and rolls from the grill and let sit for about 5 minutes. This would be a good time to make a quick salad. Don't forget to throw some fresh herbs in the salad, they will pair well with the basil in the pesto. I suggest a nice Pinot Noir from Oregon (shocking really I know, I suggest this wine with everything). Slice and enjoy, voila;

Wednesday, September 14, 2011
Cooking 101; Duck a L'Orange (sort of)
First of all, sorry about the delay between posts. Summer has interfered with my writing. I seem to have scheduled WAY too many things to do in a short period of time. Surprise birthday party for wife's brother. Family reunion on her side of the family (post to come from that ). Vacation to Wisconsin, (LOTS of post from that one) and finally a major home remodeling, windows and vinyl siding ( maybe a post if it all goes well). Whew no wonder I am exhausted (NO nothing to do with age).
Rest assured in the weeks to come you will have MORE posts than you care to read, (OK maybe one post is more but whatever). First up another product review. I know the title says Cooking 101 but really this is pre-cooked food so how hard can it be. When all is said and done, not hard at all. Let start with the ingredients for a delicious supper, one pre-cooked Maple Leaf duck in two halves, sold at your local Costco store (maybe, the one big complaint with Costco is one week it's here the next it's gone). One salad, your choice of ingredients, we had romaine and arugula with a poppyseed dressing , some grilled bread, again your choice , I love store bought naan on the grill and for dessert, scones in a box, surprisingly good if you dress them up a bit (more on that later).
Ingredients lined up for cooking;


Quick, easy and delicious. Try it for your next supper. OH and a perfect meal for either a powerful white like a crisp Chardonnay or a subtle red , California Pinot Noir comes to mind.
Rest assured in the weeks to come you will have MORE posts than you care to read, (OK maybe one post is more but whatever). First up another product review. I know the title says Cooking 101 but really this is pre-cooked food so how hard can it be. When all is said and done, not hard at all. Let start with the ingredients for a delicious supper, one pre-cooked Maple Leaf duck in two halves, sold at your local Costco store (maybe, the one big complaint with Costco is one week it's here the next it's gone). One salad, your choice of ingredients, we had romaine and arugula with a poppyseed dressing , some grilled bread, again your choice , I love store bought naan on the grill and for dessert, scones in a box, surprisingly good if you dress them up a bit (more on that later).
Ingredients lined up for cooking;


First make the scones according to directions on box, I buy the King Aurthur brand ( good old Vermont company) and to the lemon and ginger scones I added some finely chopped candy ginger. Pop them in the oven and turn your thoughts to the duck, don't think long and hard about the sauce for the ducks like I did, there is actually a good orange sauce right in the package DUH !! Could of saved me some time. I suggest cooking the ducks on the grill, cuz even though they are pre-cooked there is still some fat (keeps them moist) and you WILL smoke up the kitchen. Since the ducks are pre-cooked, all you are doing is warming them up and putting some nice grill marks on them. Cooking time is 5-10 minutes per side. Throw some naan on the grill, make yourself a nice salad. We did romaine and arugula, the pepperyness (another new word) of the arugula balanced the sweetness of the sauce nicely. Take the scones out and make a quick glaze, (mix together confectioners sugar and milk to the right consistency to frost scones. I added some lemon juice to compliment the flavors in the scone) and sprinkle over the top of the scones and VOILA;


Quick, easy and delicious. Try it for your next supper. OH and a perfect meal for either a powerful white like a crisp Chardonnay or a subtle red , California Pinot Noir comes to mind.
Thursday, August 4, 2011
Cooking 101: Fettucine and Meatballs
OK, not so much a recipe this time, as an endorsement. Sometimes life gets in the way of Supper and you need to come up with something quick. Whether for a quick supper with the wifey or a meal with friends and family, here is what we put together on Saturday;


All three products available at your friendly, neighborhood Costco store ( or I am sure, grocery store also). Add the first two ingredients to a crock pot, turn on low and go take a nap, (OK this was my recipe, you may not want to follow it exactly). Now if you ARE following exactly, wake up from your nap, realize the crock pot was on low AND the meatballs went in frozen, so now crank up the pot to high and after your guests arrive, stall them with appetizers and several drinks. Appetizers can be most anything, but as we had perused our local farmers market (see previous post) we had some stuffed breads to offer, garlic and roasted tomatoes and my favorite, blue cheese and pear.
For drinks you can add your personal favorites or some of my previous tinis, OR better yet, here are two brand new concoctions for you to try. The first I call Tropics in a Glass ( makes two)
2 ounces Coconut Rum
2 ounces Mango Rum
2 ounces fresh Mango Juice
4 ounces Lemonade
Splash of pineapple juice from the sliced pineapples in a can
1 Pineapple slice split in two
Shake the first 5 ingredients vigorously in a shaker with ice cubes . Strain into martini glasses and one piece pineapple slice to rim and VOILA;

The first drink was found delicious by all who tried it, For the second drink, I went away from the tropics and more to home grown fruits. This one shall be dub ummmm hmmm naming contest, I will go with the Black Berritini but really that title sucks, all my loyal readers, what do you think? Here are the ingredients;
In a shaker glass , muddle
Large handful of ripe fresh blackberries
4-5 sprigs of fresh mint
To this add;
2 ounces coconut rum
2 ounces regular rum
6 ounces lemonade
Shake vigorously and again VOILA;

What would you name the lovely concoction? For the guys , two new beers, Ommegang Abbey and Noire de Chambly. The first brewed in Cooperstown NY and the Second in Quebec. Both were delicious, with a slight edge going to Noire de Chambly.


As you can tell, not images I took, sorry, forgot to photo the beers, ANYWAYS back to our regularly scheduled dinner. So with drinks and appetizers in hand and a very addicting program I had downloaded on the laptop, Spotify, (try the free version, you have to listen to a few ads but man is it fun to try and stump the computer), we were all having a great time. As far as we can tell, you just can't stump this program, I think they have every song ever made. In no particular order we found and listened to Dominique by the Singing Nun, Battle of New Orleans by Johnny Horton, 10 cc, Play that funky music white boy (Leif Garret sang this also who knew?), Black Sabbath, The Ballad of the Green Berets Oh and about a few hundred more. So while everyone was engrossed in digging up the most obscure songs ever ( The Singing Nun, REALLY), I checked on the meatballs, thawed and hot, just how I like my meatballs. On went a huge pot of boiling (OK, technically it started out as non-boiling and soon became boiling) water with olive oil and kosher salt thrown in. Drop in the fresh pasta, wait a couple of minutes, (no more people, this is FRESH pasta, no more than 2 -3 minutes REALLY). Dump the pasta into a nice big colander, back into the now empty pot , splash of extra virgin (olive oil !!) and you are ready to serve.
Best way I have found is assembly line style. On the counter your first dish should be pasta, next the crock pot with the meatballs, (lid removed DUH) and finally a micro plane with a nice block of Parmigiano-Reggiano. Here is where you need to spend a bit more, c'mon supper was inexpensive, buy GOOD cheese (hey that should be my new motto). We went with a nice block from (where else) Costco but any good cheese shop can help you here. DO NOT buy shredded parm at the grocery store YUCKKKKKKK !!! And if you have some , some fresh thinly shredded basil over the top would be Divine (OH yea I just used the word Divine). Everyone agreed a great meal. And for dessert from our trip to the farmers market.

Moroccan delights, small but intense flavors, a perfect dessert. But feel free to insert your own dessert. There you go, a quick easy meal for two or many more.


All three products available at your friendly, neighborhood Costco store ( or I am sure, grocery store also). Add the first two ingredients to a crock pot, turn on low and go take a nap, (OK this was my recipe, you may not want to follow it exactly). Now if you ARE following exactly, wake up from your nap, realize the crock pot was on low AND the meatballs went in frozen, so now crank up the pot to high and after your guests arrive, stall them with appetizers and several drinks. Appetizers can be most anything, but as we had perused our local farmers market (see previous post) we had some stuffed breads to offer, garlic and roasted tomatoes and my favorite, blue cheese and pear.
For drinks you can add your personal favorites or some of my previous tinis, OR better yet, here are two brand new concoctions for you to try. The first I call Tropics in a Glass ( makes two)
2 ounces Coconut Rum
2 ounces Mango Rum
2 ounces fresh Mango Juice
4 ounces Lemonade
Splash of pineapple juice from the sliced pineapples in a can
1 Pineapple slice split in two
Shake the first 5 ingredients vigorously in a shaker with ice cubes . Strain into martini glasses and one piece pineapple slice to rim and VOILA;

The first drink was found delicious by all who tried it, For the second drink, I went away from the tropics and more to home grown fruits. This one shall be dub ummmm hmmm naming contest, I will go with the Black Berritini but really that title sucks, all my loyal readers, what do you think? Here are the ingredients;
In a shaker glass , muddle
Large handful of ripe fresh blackberries
4-5 sprigs of fresh mint
To this add;
2 ounces coconut rum
2 ounces regular rum
6 ounces lemonade
Shake vigorously and again VOILA;

What would you name the lovely concoction? For the guys , two new beers, Ommegang Abbey and Noire de Chambly. The first brewed in Cooperstown NY and the Second in Quebec. Both were delicious, with a slight edge going to Noire de Chambly.


As you can tell, not images I took, sorry, forgot to photo the beers, ANYWAYS back to our regularly scheduled dinner. So with drinks and appetizers in hand and a very addicting program I had downloaded on the laptop, Spotify, (try the free version, you have to listen to a few ads but man is it fun to try and stump the computer), we were all having a great time. As far as we can tell, you just can't stump this program, I think they have every song ever made. In no particular order we found and listened to Dominique by the Singing Nun, Battle of New Orleans by Johnny Horton, 10 cc, Play that funky music white boy (Leif Garret sang this also who knew?), Black Sabbath, The Ballad of the Green Berets Oh and about a few hundred more. So while everyone was engrossed in digging up the most obscure songs ever ( The Singing Nun, REALLY), I checked on the meatballs, thawed and hot, just how I like my meatballs. On went a huge pot of boiling (OK, technically it started out as non-boiling and soon became boiling) water with olive oil and kosher salt thrown in. Drop in the fresh pasta, wait a couple of minutes, (no more people, this is FRESH pasta, no more than 2 -3 minutes REALLY). Dump the pasta into a nice big colander, back into the now empty pot , splash of extra virgin (olive oil !!) and you are ready to serve.
Best way I have found is assembly line style. On the counter your first dish should be pasta, next the crock pot with the meatballs, (lid removed DUH) and finally a micro plane with a nice block of Parmigiano-Reggiano. Here is where you need to spend a bit more, c'mon supper was inexpensive, buy GOOD cheese (hey that should be my new motto). We went with a nice block from (where else) Costco but any good cheese shop can help you here. DO NOT buy shredded parm at the grocery store YUCKKKKKKK !!! And if you have some , some fresh thinly shredded basil over the top would be Divine (OH yea I just used the word Divine). Everyone agreed a great meal. And for dessert from our trip to the farmers market.

Moroccan delights, small but intense flavors, a perfect dessert. But feel free to insert your own dessert. There you go, a quick easy meal for two or many more.
Thursday, July 21, 2011
Cooking 101 : Cheese Souffle
Since we are not related to Donald Trump, eating out every night of the week is not an option. AND since we love the Travel Channel and Food Network, trying new and exotic food are high on our list of things we love to do. So every now and then we put our heads together and come up with a recipe that tests are abilities (homemade chicken mole anyone, yummy but LOTS of ingredients). This portion of the blog will be called Cooking 101 and no I will not be explaining how to take Banquet chicken from the box , put it on a cookie sheet and bake for 45 minutes. Oops I just did , OK there's your first recipe !!
For this adventure we decided Souffles were in order, Why? Who knows it sounded good at the time and was exotic and hard enough to make us see if we could master it. Why a savory souffle? Again I can not remember the exact thinking other than maybe we wanted a healthy version ( RIGHT) or more likely it is impossible to keep chocolate in our house (you know who you are). But first a drink was in order, as a very wise woman once said " I love cooking with wine, sometimes I even put some in the food". So today's concoction a Ras-Mintini.

For the soon to be world famous Ras-Mintini;
In a cocktail shaker, Muddle a small handful of fresh mint and fresh raspberries together.
Add 3 ounces of your favorite rum (we used Mango Rum for an extra tropical kick).
Top with Fresh lemonade, add ice, shake, strain and Voila a perfect summer cooler.
With Mintini in hand, we were ready to tackle the mysterious souffle. And since this isn't a detective novel let me fast forward to the end, Souffles are EASY, the absolute hardest part is separating six eggs. But I am getting ahead of myself. What to serve with the soon to be spectacular souffles? A beautiful side of wild sockeye salmon, cooked simply on the grill with an Indian spice dry rub.
Allow me a quick rant, (like you could stop me, I am writing this after all). Our local Costco store had some gorgeous wild sockeye salmon fillets and right around the corner, in the same case, farm raised salmon for a dollar a pound MORE !! And people were buying them !!! PEOPLE, PEOPLE farm raised salmon is tasteless and REALLY, REALLY bad for the environment. Gigantic pens in the ocean, leeching chemicals, food and waste into formerly pristine waters. PLEASE, always buy wild salmon , and if its not available look for Steelhead fillets, these are pond raised in the USA with very strict controls. Nothing leeches out, it all stays in the ponds, which are closely regulated by our government. And now back to our regularly scheduled recipe.
First step , always mis en place (French for everything in its place or in English don't forget the most important ingredient dummy). You will need;
4 tablespoons Butter
1/4 cup All purpose Flour
1 1/2 cups Milk warmed but not boiling
6 Eggs (at room temperature) separated
1/4 cup Fresh Herbs (whatever you have growing , you do grow fresh herbs right?) We used a combo of Basil, Rosemary and Thyme YUMMY
1/2 cup grated Parmesan Cheese
1/2 cup grated your choice Cheese (we used smoked Gouda but next time may switch to a hard goat cheese for a more robust cheese flavor).
Pre-Heat oven to 375 one hour before you want to start cooking. Yea, this isn't a recipe to try when its 100 outside, it will heat up your kitchen to hellish levels.
Prepare souffle ramekins or 2 quart souffle pan (we used six, cup size ramekins that I had gotten with a creme brulee set and these worked great though we did have left over souffle so 8 would of been perfect), by thoroughly buttering the insides (don't skimp its important) and dusting the inside with grated Parmesan, it will stick to the butter and you can dump the excess out into the next ramekin.
Now lets start assembly. But first a Food Network hint, when separating eggs use three clean bowls, separate over the middle one, add yolks to one bowl and pour out the white into a separate bowl, that way you always only have one egg white in the bowl in front of you. Absolutely sucks to get to the 6th egg and drop yolk into the other five whites, ruining it all. We went through ALOT of eggs but only ruined one at a time, (to be fair the dozen eggs we bought had 4 cracked ones GRRRR). Back to assembly, melt the butter at med-low heat until it stops foaming, stir in the flour and whisk for around three minutes until well incorporated and starting to color a very little bit. Now whisk in the milk a little bit at a time, allow to cool slightly and whisk in the egg yolks and the cheese. Once the cheese melts, remove from heat and set aside.
Beat the egg whites to stiff peaks, (we used a stand mixer MUCH easier but keep your eyes on the whites as it takes very little time once they start forming to get to stiff peak, ours may have been a touch too stiff but they worked, phew).
Hang in there gang, we are on the home stretch. And I apologize for not having photos as we assembled, I blame the Mintinis. Now add the herbs to the yolk mixture and mix 1/3 of the egg whites in, don't worry about being gentle at this point you need to loosen up the yolk mixture. Add the rest of the egg whites and now you need to be gentle, fold with a wide spatula from bottom to top until all incorporated, its OK if there is still some white showing you need to keep the air in the mixture so it will rise. Pour into each ramekin (or one big one) until almost full, we put the ramekins on a cookie sheet just in case and plus its easier to handle on a cookie sheet than 6 individual ramekins. Put into the oven for 30 minutes or until a skinny skewer comes out moist but clean (what the heck does that mean, we left them in until they were really nicely browned on top and a toothpick came out clean, about 26 minutes).
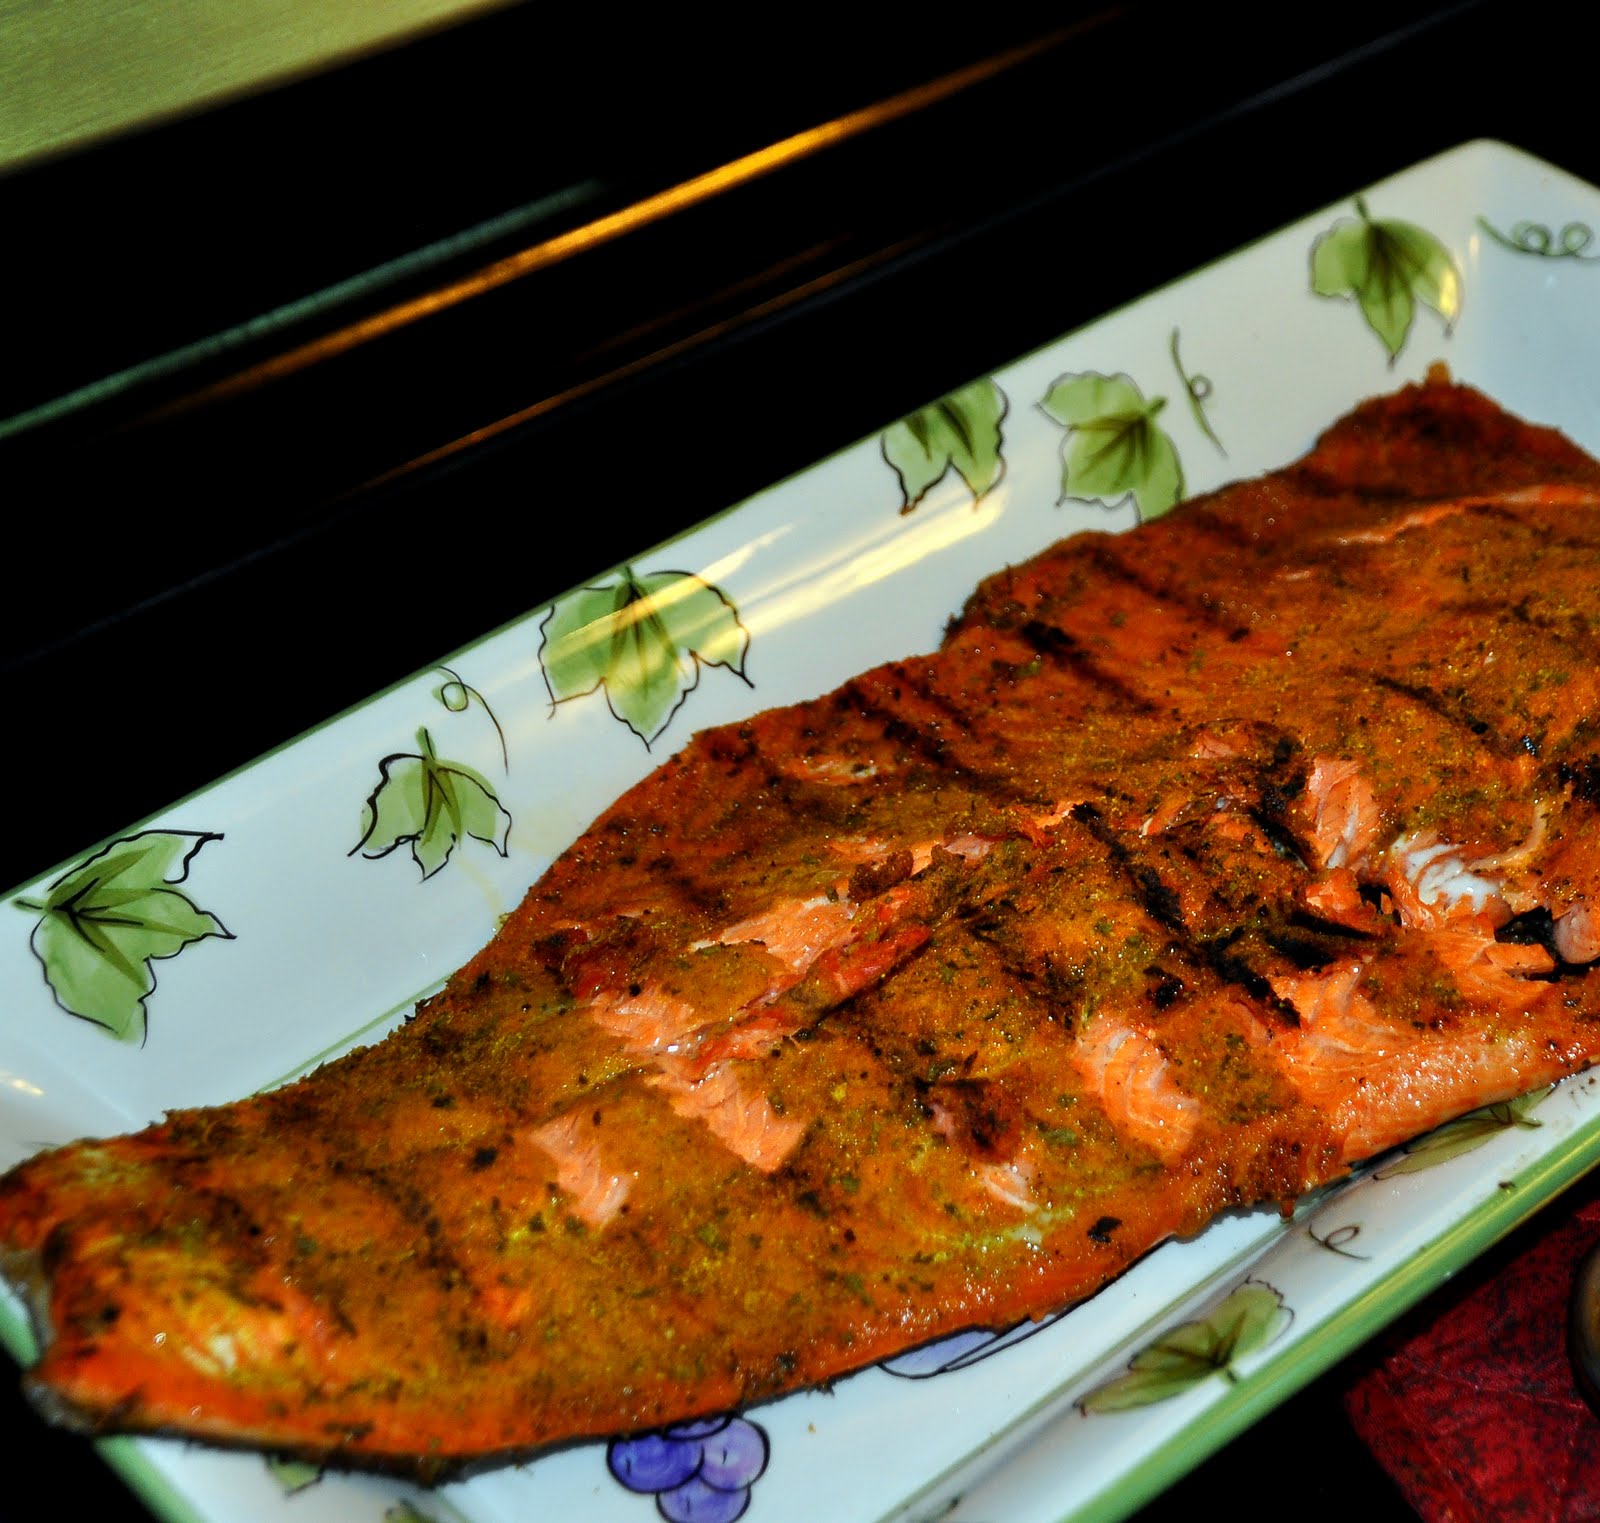
And to deflate (hee hee) a misconception, you do not have to tiptoe around the kitchen just to make sure the souffles actually rise. We went about our normal business and even (gently) peaked in the oven (maybe not the best idea) and we had no problems. OK, stop drinking mintinis and go put the salmon on the grill, flesh side first for a few minutes to get some nice grill marks and then flip until cooked , probably 10-15 minutes for a good size fillet, stop when the thickest part still shows a little raw as it will continue to cook off the grill, DON"T OVERCOOK YUCK !! And for the grand unveiling;


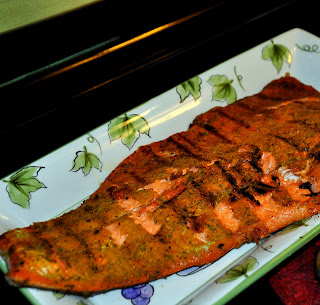
So as you can see, souffles are not made of gold and us ordinary mortals can make them just like the pros, except we don't have someone to do the cleaning for us, DARN. Just a couple last observations, Souffles do deflate, so plan on serving them as soon as the get out of the oven, this means have everything else ready and serve HOT. But cold souffles are darn tasty (Who Knew),if just a little flatter, though to me they taste like quiches, not necessarily a bad thing.
On the Andy scale of cooking from 1(EZ Mac) to 10 (Molecular Gastronomy) I rate this recipe a 4. Really people, the hardest part is the prep work, so have fun and play with the flavors, this recipe just calls for improv, different cheeses, different herbs. Wifey says next time we are to add cooked bacon bits to the batter YUMMY !! And I have a recipe for a chocolate souffle with a white bourbon sauce added to the center. Until next time Happy Cooking !!
For this adventure we decided Souffles were in order, Why? Who knows it sounded good at the time and was exotic and hard enough to make us see if we could master it. Why a savory souffle? Again I can not remember the exact thinking other than maybe we wanted a healthy version ( RIGHT) or more likely it is impossible to keep chocolate in our house (you know who you are). But first a drink was in order, as a very wise woman once said " I love cooking with wine, sometimes I even put some in the food". So today's concoction a Ras-Mintini.

For the soon to be world famous Ras-Mintini;
In a cocktail shaker, Muddle a small handful of fresh mint and fresh raspberries together.
Add 3 ounces of your favorite rum (we used Mango Rum for an extra tropical kick).
Top with Fresh lemonade, add ice, shake, strain and Voila a perfect summer cooler.
With Mintini in hand, we were ready to tackle the mysterious souffle. And since this isn't a detective novel let me fast forward to the end, Souffles are EASY, the absolute hardest part is separating six eggs. But I am getting ahead of myself. What to serve with the soon to be spectacular souffles? A beautiful side of wild sockeye salmon, cooked simply on the grill with an Indian spice dry rub.
Allow me a quick rant, (like you could stop me, I am writing this after all). Our local Costco store had some gorgeous wild sockeye salmon fillets and right around the corner, in the same case, farm raised salmon for a dollar a pound MORE !! And people were buying them !!! PEOPLE, PEOPLE farm raised salmon is tasteless and REALLY, REALLY bad for the environment. Gigantic pens in the ocean, leeching chemicals, food and waste into formerly pristine waters. PLEASE, always buy wild salmon , and if its not available look for Steelhead fillets, these are pond raised in the USA with very strict controls. Nothing leeches out, it all stays in the ponds, which are closely regulated by our government. And now back to our regularly scheduled recipe.
First step , always mis en place (French for everything in its place or in English don't forget the most important ingredient dummy). You will need;
4 tablespoons Butter
1/4 cup All purpose Flour
1 1/2 cups Milk warmed but not boiling
6 Eggs (at room temperature) separated
1/4 cup Fresh Herbs (whatever you have growing , you do grow fresh herbs right?) We used a combo of Basil, Rosemary and Thyme YUMMY
1/2 cup grated Parmesan Cheese
1/2 cup grated your choice Cheese (we used smoked Gouda but next time may switch to a hard goat cheese for a more robust cheese flavor).
Pre-Heat oven to 375 one hour before you want to start cooking. Yea, this isn't a recipe to try when its 100 outside, it will heat up your kitchen to hellish levels.
Prepare souffle ramekins or 2 quart souffle pan (we used six, cup size ramekins that I had gotten with a creme brulee set and these worked great though we did have left over souffle so 8 would of been perfect), by thoroughly buttering the insides (don't skimp its important) and dusting the inside with grated Parmesan, it will stick to the butter and you can dump the excess out into the next ramekin.
Now lets start assembly. But first a Food Network hint, when separating eggs use three clean bowls, separate over the middle one, add yolks to one bowl and pour out the white into a separate bowl, that way you always only have one egg white in the bowl in front of you. Absolutely sucks to get to the 6th egg and drop yolk into the other five whites, ruining it all. We went through ALOT of eggs but only ruined one at a time, (to be fair the dozen eggs we bought had 4 cracked ones GRRRR). Back to assembly, melt the butter at med-low heat until it stops foaming, stir in the flour and whisk for around three minutes until well incorporated and starting to color a very little bit. Now whisk in the milk a little bit at a time, allow to cool slightly and whisk in the egg yolks and the cheese. Once the cheese melts, remove from heat and set aside.
Beat the egg whites to stiff peaks, (we used a stand mixer MUCH easier but keep your eyes on the whites as it takes very little time once they start forming to get to stiff peak, ours may have been a touch too stiff but they worked, phew).
Hang in there gang, we are on the home stretch. And I apologize for not having photos as we assembled, I blame the Mintinis. Now add the herbs to the yolk mixture and mix 1/3 of the egg whites in, don't worry about being gentle at this point you need to loosen up the yolk mixture. Add the rest of the egg whites and now you need to be gentle, fold with a wide spatula from bottom to top until all incorporated, its OK if there is still some white showing you need to keep the air in the mixture so it will rise. Pour into each ramekin (or one big one) until almost full, we put the ramekins on a cookie sheet just in case and plus its easier to handle on a cookie sheet than 6 individual ramekins. Put into the oven for 30 minutes or until a skinny skewer comes out moist but clean (what the heck does that mean, we left them in until they were really nicely browned on top and a toothpick came out clean, about 26 minutes).
And to deflate (hee hee) a misconception, you do not have to tiptoe around the kitchen just to make sure the souffles actually rise. We went about our normal business and even (gently) peaked in the oven (maybe not the best idea) and we had no problems. OK, stop drinking mintinis and go put the salmon on the grill, flesh side first for a few minutes to get some nice grill marks and then flip until cooked , probably 10-15 minutes for a good size fillet, stop when the thickest part still shows a little raw as it will continue to cook off the grill, DON"T OVERCOOK YUCK !! And for the grand unveiling;


So as you can see, souffles are not made of gold and us ordinary mortals can make them just like the pros, except we don't have someone to do the cleaning for us, DARN. Just a couple last observations, Souffles do deflate, so plan on serving them as soon as the get out of the oven, this means have everything else ready and serve HOT. But cold souffles are darn tasty (Who Knew),if just a little flatter, though to me they taste like quiches, not necessarily a bad thing.
On the Andy scale of cooking from 1(EZ Mac) to 10 (Molecular Gastronomy) I rate this recipe a 4. Really people, the hardest part is the prep work, so have fun and play with the flavors, this recipe just calls for improv, different cheeses, different herbs. Wifey says next time we are to add cooked bacon bits to the batter YUMMY !! And I have a recipe for a chocolate souffle with a white bourbon sauce added to the center. Until next time Happy Cooking !!
Subscribe to:
Posts (Atom)